One of the activities that every amateur should run it on your telescope, to take advantage of a powerful tool, It is the collimation of the optical. To do this, there are several techniques, that exploit various devices, like a needle pierced the door or a collimator Cheshire or Autocollimator or through the Star Test, or by using a laser collimator.
The latter type of collimator, Positioned in the focuser instead of the eyepiece and uses a laser beam, before rebounding on the secondary mirror, then again on the primary and on the secondary, It allows to adjust the inclination of the mirrors, in such a way that the return beam result exactly superimposed to the starting radius. When this happens the optics are exactly orthogonal to each other and the collimation has been reached.
The laser collimator therefore allows a rapid setting up the instrument (that will always be verified at the star test) provided of course, that the outgoing laser beam from the collimator, It is perfectly coaxial therewith.
If the collimator is not "collimated" , as the beam is not perfectly coaxial to the barrel that slides into the focuser, collimation that results may not be optimal, because the optics of the primary and the secondary will be perfectly orthogonal to each other, but not even with the eyepiece axis.
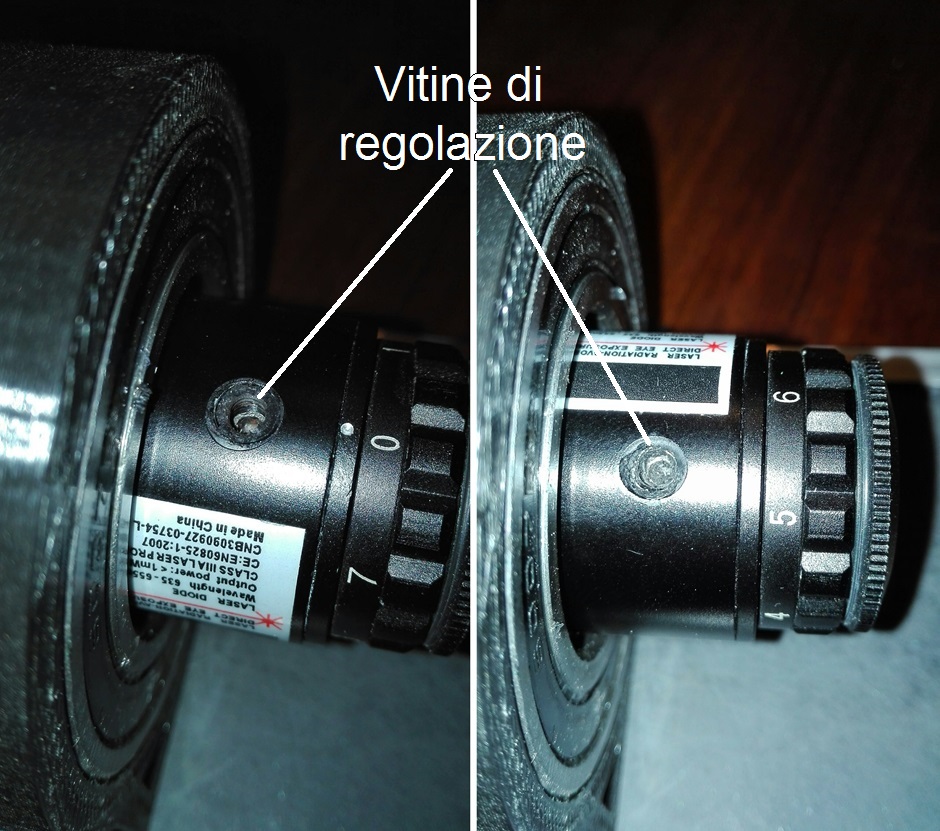
If the collimator is rotated around its own axis, while it is still entered in the focuser, you should look, that the bright dot, produced by laser beam, does not move. If this happens and describes a circle, It means that there is an angle between the axis of the collimator barrel and the axis of the laser beam, that must be eliminated through the 3 small screws adjustment (caution: often small screws of the housing is filled with silicone. If you have to act on them you need to be removed).
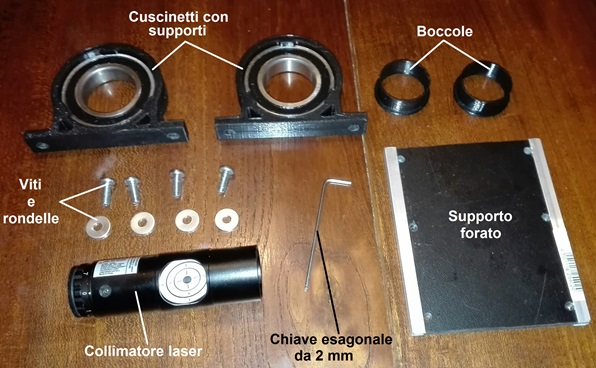
One way to check, and possibly easily collimate the own collimator, It is to provide a device like the one shown in the following figure, formed by a base, two bearings 6007 having an inner diameter 35 mm, two supports for the bearings and two bushings to adapt the outer diameter of the barrel of the collimator of 31.8mm with 35mm inner diameter of the bearing.
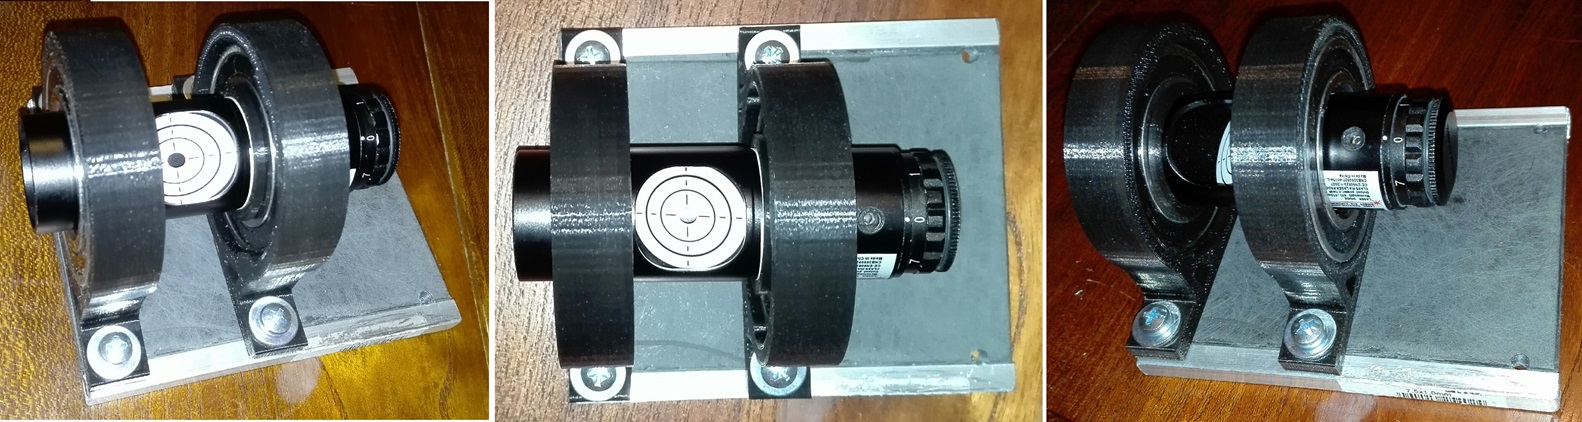
At this point just put the collimator in bushings and observe the luminous dot moving the collimator to rotate around its own axis.
Once tucked the collimator in the bearings, fix the base of the device on a table, vice or any other support, so that the laser pointer can project its beam on the wall of a distant wall 4-5 meters.
Now just turn on the laser and mark with a pencil the spot where the laser beam is projected on the wall. After that rotate the collimator around its axis 90 °, and mark with a pencil the new point at which the laser beam is projected on the wall (probably different from the previous). Then repeat two more times the operation always rotating 90 ° the collimator with respect to the previous position.
Once the operation is performed for all four positions, connect with a line, two by two points found, so as to obtain a cross. The point of intersection of the lines, It will be the point at which you will have to drop the laser beam by adjusting the appropriate small screws, for the collimation of the collimator.
If the adjustment has been done with care, again rotating the collimator around its own axis, you should notice an appreciable movement of the red dot projected on the wall.
In the following video shows the above, for groped to make it as understandable as possible the procedure to be performed:
Carlo Veronese